Prerequisites
- Home Assistant Voice Preview Edition
- USB-C cable and USB power supply (these are not included in the box)
- Home Assistant server.
- The Home Assistant Voice Preview Edition is not a standalone device. For it to work, it needs to connect to Home Assistant, which is installed on a device to act as a server, for example on a Home Assistant Green.
- If you do not have Home Assistant installed yet, refer to the installation documentation for instructions.
- If you already have Home Assistant, make sure to update to the most recent version.
- In the Home Assistant UI, you are logged in with a user that has Administrator rights on Home Assistant.
- To check if a user has Administrator rights, you need to be logged in with Administrator rights.
- Go to Settings > People and check the settings for that user.
- The password to your 2.4 GHz Wi-Fi network
- Some routers default to the 5 Ghz frequency. In that case, you need to specifically select the 2.4 Ghz.
Note: This guide was tested using Home Assistant Operating System on Home Assistant Yellow and on Home Assistant Green.
Onboarding via phone
Using your iPhone/Android is the easiest way to connect your Home Assistant Voice Preview Edition to your Wi-Fi network.
- Have the Home Assistant Companion app installed on your iPhone or Android and configured to connect to your Home Assistant server.
- The Home Assistant Companion app is a client software. This means it allows you to access and use your Home Assistant server from a mobile device.
- Note that in the app store, it is called Home Assistant. In the app itself, it is called Companion app.
- Make sure the version of the Home Assistant Companion app is up to date.
- You are logged in to your Home Assistant Companion app with a user that has Administrator rights on Home Assistant.
- On your phone, make sure Bluetooth is enabled.
- Make sure the Home Assistant Companion app has Bluetooth permission:
- On iPhone, go to Settings > Privacy & Security and enable Bluetooth for Home Assistant.
- On Android: make sure you’ve enabled precise location service permissions for Home Assistant. It is used for onboarding only. You can disable it again afterward.
- Go to Settings > Apps > Home Assistant > Permissions and enable Location, Allow all the time and Use precise location.
Onboarding via Bluetooth
If you don't want to use a phone and your Home Assistant has Bluetooth: either onboard Bluetooth, or an ESPHome device set up as a Bluetooth proxy and connected to Home Assistant.
To connect the device to your Wi-Fi and to Home Assistant
Step 1
Connecting the device to the power source

- Use the USB-C cable to connect the device to a power source.
- Result: You should see a warm white twinkle animation.
- If you have previously used this device with another Home Assistant hub, reset Home Assistant Voice Preview Edition.
- Home Assistant Voice Preview Edition stores an encryption key tied to the original Home Assistant hub, even if the device is removed from that hub. The reset deletes that key and a new key will be generated during setup.
Step 2
Opening the Home Assistant UI
- If you're using your phone, open the Home Assistant Companion App.
- If your Home Assistant has Bluetooth, open Home Assistant in a browser.
Step 3
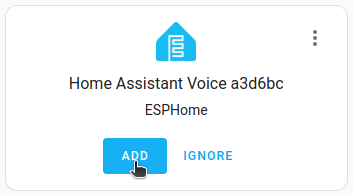
Adding the integration
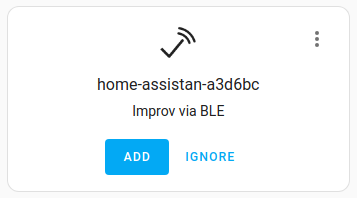
- Go to Settings > Devices & services and under Discovered, you should see the device as "home-assistant-xx Improv via BLE".
- Select Add, then Submit.
Step 4
Entering your Wi-Fi credentials
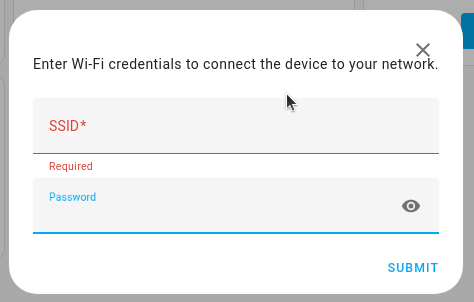
- In the SSID field, enter the name of your Wi-Fi.
- If you have different Wi-Fi names for the 2.4 GHz and the 5 GHz Wi-Fi networks, make sure you use the credentials for the 2.4 GHz network.
Step 5
Authorizing your connection
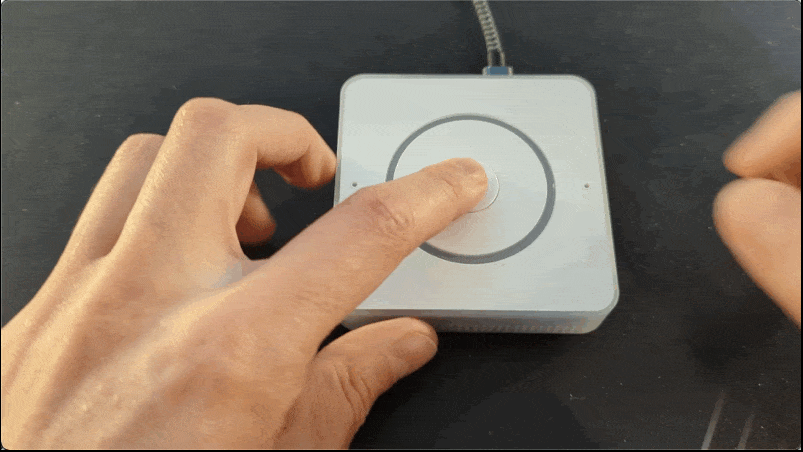
- When prompted, press the center button on Home Assistant Voice.
- Info: This is to confirm that you are the one trying to connect the device.
- Troubleshooting: If you now see a message “Failed to connect”, continue with the Troubleshooting steps.
- Success! Your device is now connected to your Wi-Fi. Close.
Step 6
Completing device discovery
- Under Discovered, add the Home Assistant Voice XXX.
- Discovered ESPHome node: select Submit.
Step 7
Following the wizard steps
- The wizard starts checking for updates.
- Follow the instructions on screen.
- If you are connected to Home Assistant Cloud, the Cloud Assistant is used. Your job is done here.
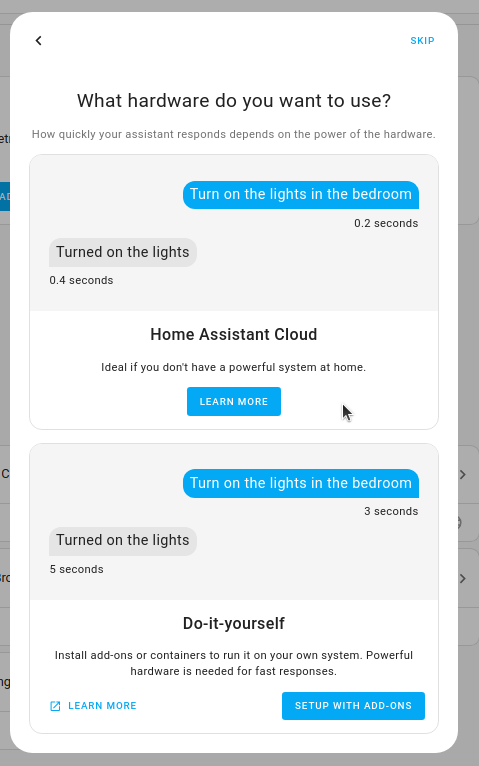
- If you are not connected to Home Assistant Cloud, you will see a step What Hardware do you want to use?:
- Option 1: If you choose Home Assistant Cloud:
- If you already have Home Assistant Cloud account, select Log in and enter your login credentials. If not, enter email and password, select Next and follow the wizard.
- If you do not have an account yet, select Learn more, then Try 1 month for free.
- For more information, refer to the guide on Getting started with Home Assistant Cloud.
- Option 2: If you choose Do it yourself:
- Info: If you have lower-power hardware, this option is not recommended. Weaker Home Assistant hardware can lead to slow speech processing.
- Select Setup with add-ons.
- Result: The required add-ons are being installed: Whisper, Piper.
- Option 1: If you choose Home Assistant Cloud:
- On the integrations page, under Discovered, Add the Whisper and Piper integrations.
Step 8
Talking to Home Assistant
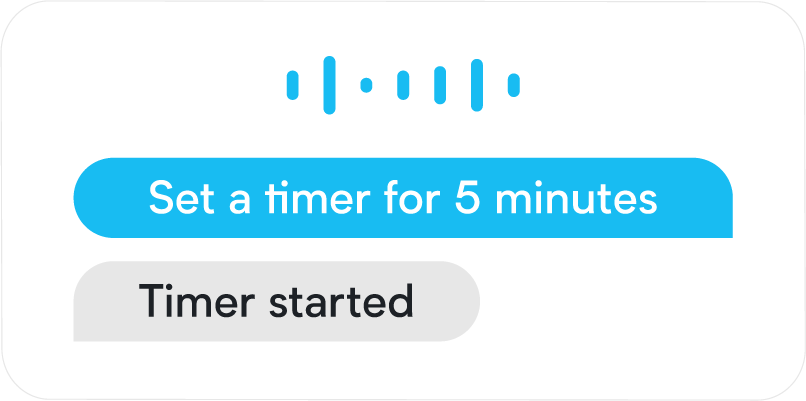
- Start controlling Home Assistant by saying a supported voice command:
- For example, “What's the time” “Turn on the light in the living room”, “Set the timer to 5 minutes”, “Is the front door locked”.
- Make sure you’re using the area name exactly as you defined it in Home Assistant.
- Troubleshooting: Is the device you want to control via Assist (for example a specific light) not responding to your voice commands? Make sure the device is exposed to Assist.
- For example, “What's the time” “Turn on the light in the living room”, “Set the timer to 5 minutes”, “Is the front door locked”.