Prerequisites
- Home Assistant Operating System installed on your smart home hub. For example:
- on a Home Assistant Green, where Home Assistant OS is preinstalled
- on a Home Assistant Yellow or on a Raspberry Pi
- have the latest updates installed
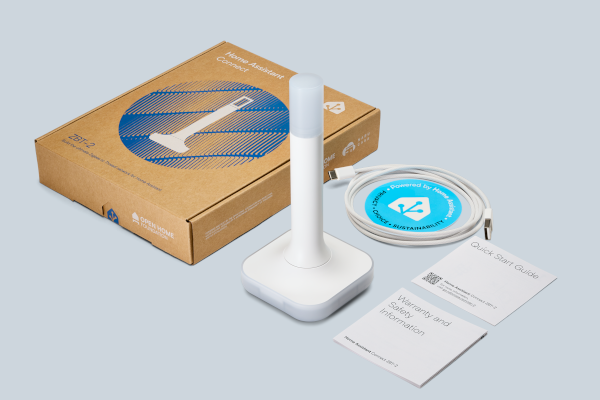
- Home Assistant Connect ZBT-2 adapter and USB extension cable
- Zigbee devices
To form a new Zigbee network
Step 1
Find a good location.
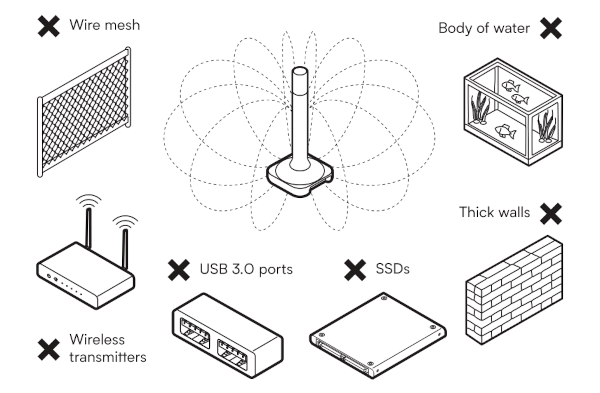
- Place the device away from objects that may cause interference or block signals, such as:
- thick walls
- wire mesh
- metal (such as server rack housings or wall mounting brackets)
- other transmitters (such as computers, routers, USB 3.0 ports, or SSDs)
- an aquarium.
Step 2
Install the device
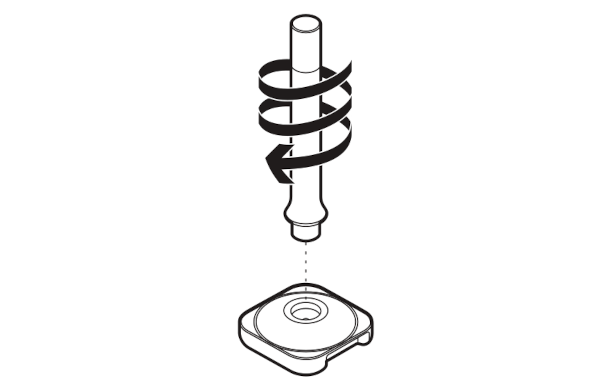
- Screw the antenna onto the base and make sure the device is placed so that the antenna is in a vertical position.
- Notice: Be careful not to overtighten. It could damage the device beyond repair.
- Don't fix the device into place permanently yet.
- After you have connected the device to Home Assistant, check if your device is in a good spot or if there is interference. If the device seems unresponsive, you might want to move it to another location.
Step 3
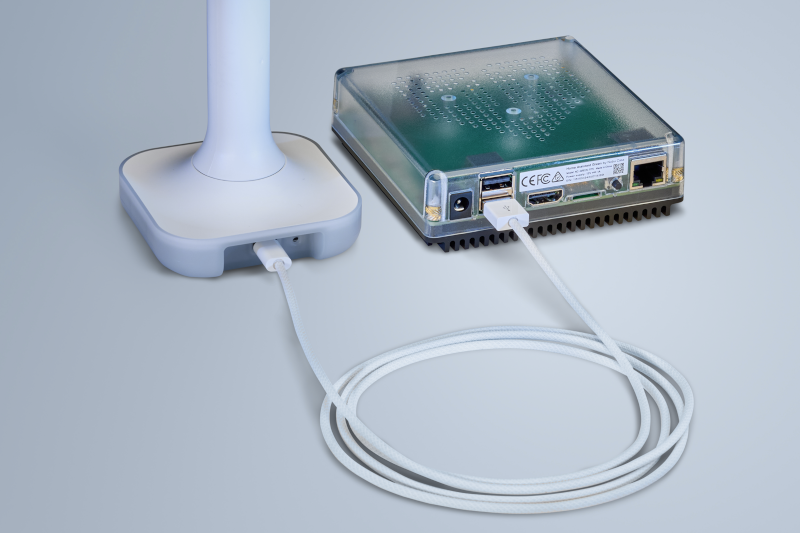
Plugging the extension cable into Home Assistant Connect ZBT-2
Notice
USB 3.0 ports and USB 3.0 drives can cause interference with 2.4 GHz protocols, including the ones provided by Home Assistant Connect ZBT-2.
- It is important to use the USB extension cable and to position the Home Assistant Connect ZBT-2 away from possible interference sources.
- This video shows the effect of interference.
- Plug the Home Assistant Connect ZBT-2 into the USB extension cable.
- Plug the extension cable into your Home Assistant instance.
- If you are using the standalone Home Assistant Container installation method, make sure Connect ZBT-2 is mapped to the container.
Step 4
Adding the Home Assistant Connect ZBT-2 integration

- Go to Settings > Devices & services.
- Connect ZBT-2 should now have been discovered.
- Troubleshooting: If the device is not discovered, check the troubleshooting steps.
- Select Add.
Step 5
Picking your protocol

- In the dialog, select Use as Zigbee adapter.
Step 6
Select installation type
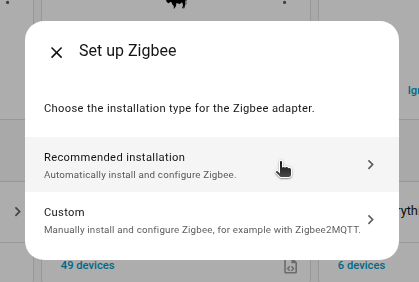
- Option 1: If you are a new user, select Recommended installation.
- This adds the device to Home Assistant and configures Zigbee with the Zigbee Home Automation integration that was developed specifically for Home Assistant.
- Option 2: If you have your own controller, for example Zigbee2MQTT, select Custom.
- This option adds the device to Home Assistant, but you will need to manually install the controller of your choice on your own.
- Those custom steps are not covered in this documentation.
Step 7
Adding devices to an area

- Follow the steps on screen, and when prompted, add the Zigbee adapter to an area.
- Select Finish.
Step 8
Adding Zigbee devices
Notice
USB 3.0 ports and USB 3.0 drives can cause interference with 2.4 GHz protocols, including the ones provided by Home Assistant Connect ZBT-2.
- It is important to use the USB extension cable and to position the Home Assistant Connect ZBT-2 away from possible interference sources.
- This video shows the effect of interference.
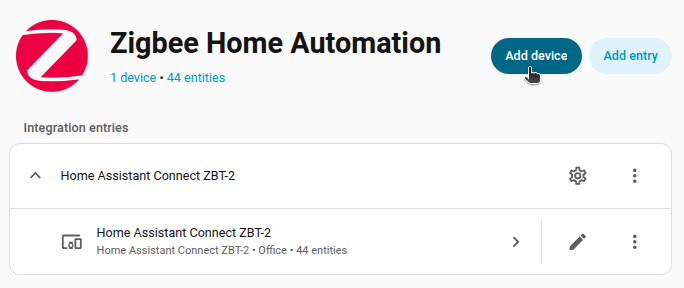
- You can now add your Zigbee devices to the Zigbee network.
- Go to Settings > Devices & services and select the Zigbee Home Automation integration.
- Select Add device.
- Result: ZHA will now search for Zigbee devices in pairing mode.
- If there are multiple router devices in the network, the joining device decides which router to use. Ideally, it chooses the one with the best signal strength.
- Put your Zigbee device into pairing mode.